amazon-orders for Python

amazon-orders is an unofficial library that provides a command line interface alongside a programmatic API that can be used to interact with Amazon.com’s consumer-facing website.

This works by parsing website data from Amazon.com. A nightly build validates functionality to ensure its stability, but as Amazon provides no official API to use, this package may break at any time. This package only supports the English version of the website.

Installation

amazon-orders is available on PyPI and can be installed using pip:

pip install amazon-orders

That’s it! amazon-orders is now available as a Python package is available from the command line.

Basic Usage

Execute amazon-orders from the command line with:

amazon-orders --username <AMAZON_EMAIL> --password <AMAZON_PASSWORD> history

Or use amazon-orders programmatically:

from amazonorders.session import AmazonSession
from amazonorders.orders import AmazonOrders

amazon_session = AmazonSession("<AMAZON_EMAIL>",
                               "<AMAZON_PASSWORD>")
amazon_session.login()

amazon_orders = AmazonOrders(amazon_session)
orders = amazon_orders.get_order_history(year=2023)

for order in orders:
    print("{} - {}".format(order.order_number, order.grand_total))

Documentation

For more advanced usage, amazon-orders‘s official documentation is available at http://amazon-orders.readthedocs.io.

Contributing

If you would like to get involved, be sure to review the Contribution Guide.

Want to contribute financially? If you’ve found amazon-orders useful, sponsorship would also be greatly appreciated!

java-ngrok – a Java wrapper for ngrok

java-ngrok - a Java wrapper for ngrok

java-ngrok is a Java wrapper for ngrok that manages its own binary, making ngrok available via a convenient Java API.

ngrok is a reverse proxy tool that opens secure tunnels from public URLs to localhost, perfect for exposing local web servers, building webhook integrations, enabling SSH access, testing chatbots, demoing from your own machine, and more, and its made even more powerful with native Java integration through java-ngrok.

Installation

java-ngrok is available on Maven Central.

Maven

<dependency>
    <groupId>com.github.alexdlaird</groupId>
    <artifactId>java-ngrok</artifactId>
    <version>2.2.15</version>
</dependency>

Gradle

implementation "com.github.alexdlaird:java-ngrok:2.2.15"

If we want ngrok to be available from the command line, pyngrok can be installed using pip to manage that for us.

Basic Usage

All ngrok functionality is available through the NgrokClient. To open a tunnel, use the connect method, which returns a Tunnel, and this returned object has a reference to the public URL generated by ngrok, which can be retrieved with getPublicUrl().

final NgrokClient ngrokClient = new NgrokClient.Builder().build();

// Open a HTTP tunnel on the default port 80
// <Tunnel: "https://<public_sub>.ngrok.io" -> "http://localhost:80">
final Tunnel httpTunnel = ngrokClient.connect();

// Open a SSH tunnel
// <Tunnel: "tcp://0.tcp.ngrok.io:12345" -> "localhost:22">
final CreateTunnel sshCreateTunnel = new CreateTunnel.Builder()
        .withProto(Proto.TCP)
        .withAddr(22)
        .build();
final Tunnel sshTunnel = ngrokClient.connect(sshCreateTunnel);

// Open a named tunnel from the config file
final CreateTunnel createNamedTunnel = new CreateTunnel.Builder()
        .withName("my_tunnel_name")
        .build();
final Tunnel namedTunnel = ngrokClient.connect(createNamedTunnel);

The connect method can also take a CreateTunnel (which can be built through its Builder) that allows us to pass additional properties that are supported by ngrok.

Assuming we have also installed pyngrok, all features of ngrok are available on the command line.

ngrok http 80

For details on how to fully leverage ngrok from the command line, see ngrok‘s official documentation.

Documentation

For more advanced usage, java-ngrok‘s official documentation is available at https://javadoc.io/doc/com.github.alexdlaird/java-ngrok.

ngrok Version Compatibility

java-ngrok is compatible with ngrok v2 and v3, but by default it will install v3. To install v2 instead, set the version with JavaNgrokConfig.Builder.withNgrokVersion(NgrokVersion) and CreateTunnel.Builder.withNgrokVersion(NgrokVersion).

Java 8

Java 8 support is not actively maintained, but on a periodic basis, main may be rebased in to the 1.4.x branch, where a compatible build of this project exists for Java 8. To use it, include the java8-ngrok dependency from Maven Central.

Maven

<dependency>
    <groupId>com.github.alexdlaird</groupId>
    <artifactId>java8-ngrok</artifactId>
    <version>1.4.13</version>
</dependency>

Gradle

implementation "com.github.alexdlaird:java8-ngrok:1.4.13"

For more details on what differs in the java8-ngrok dependency, see the docs.

Contributing

If you would like to get involved, be sure to review the Contribution Guide.

Want to contribute financially? If you’ve found java-ngrok useful, sponsorship would also be greatly appreciated!

hookee – command line webhooks, on demand

hookee is a utility that provides command line webhooks, on demand! Dump useful request data to the console, process requests and responses, customize response data, and configure hookee and its routes further in any number of ways through custom plugins.

Installation

hookee is available on PyPI and can be installed using pip:

pip install hookee

or conda:

conda install -c conda-forge hookee

That’s it! hookee is now installed.

Basic Usage

hookee makes it easy to get webhooks on the fly right from the console. Simply start it with:

hookee start

With its default configuration, this will start a server on port 5000, open a ngrok tunnel using pyngrok, and mount a URL at /webhook. Sending any request to the /webhook endpoint will dump the request and response data to the console.

hookee can be configured in a number of ways to quickly and easily tweak request and response data. For example, here we are customizing the response body from /webhook using the --response arg.

hookee --response "<Response>Ok</Response>" --content-type application/xml

To see the ways hookee can be tweaked right from the console, view its documented args and commands like this:

hookee --help

Documentation

For more advanced usage, including how hookee default configuration can be changed, extended through plugins, and more, see its official documentation is available at http://hookee.readthedocs.io.

Contributing

If you would like to get involved, be sure to review the Contribution Guide.

Want to contribute financially? If you’ve found hookee useful, sponsorship would also be greatly appreciated!

pyngrok – a Python wrapper for ngrok

pyngrok is a Python wrapper for ngrok that manages its own binary and puts it on your path, making ngrok readily available from anywhere on the command line and via a convenient Python API.

ngrok is a reverse proxy tool that opens secure tunnels from public URLs to localhost, perfect for exposing local web servers, building webhook integrations, enabling SSH access, testing chatbots, demoing from your own machine, and more, and its made even more powerful with native Python integration through pyngrok.

Installation

pyngrok is available on PyPI and can be installed using pip:

pip install pyngrok

or conda:

conda install -c conda-forge pyngrok

That’s it! pyngrok is now available as a package to our Python projects, and ngrok is now available from the command line.

Basic Usage

To open a tunnel, use the connect method, which returns the public URL generated by ngrok.

from pyngrok import ngrok

# Open a HTTP tunnel on the default port 80
# <NgrokTunnel: "http://<public_sub>.ngrok.io" -> "http://localhost:80">
http_tunnel = ngrok.connect()

# Open a SSH tunnel
# <NgrokTunnel: "tcp://0.tcp.ngrok.io:12345" -> "localhost:22">
ssh_tunnel = ngrok.connect(22, "tcp")

# Open a named tunnel from the config file
named_tunnel = ngrok.connect(name="my_tunnel_name")

The connect method takes kwargs as well, which allows us to pass additional properties that are supported by ngrok.

This package puts the default ngrok binary on our path, so all features of ngrok are available on the command line.

ngrok http 80

For details on how to fully leverage ngrok from the command line, see ngrok’s official documentation.

Documentation

For more advanced usage, pyngrok‘s official documentation is available at http://pyngrok.readthedocs.io.

ngrok Version Compatibility

pyngrok is compatible with ngrok v2 and v3, but by default it will install v3. To install v2 instead, set ngrok_version in PyngrokConfig:

from pyngrok import conf

conf.get_default().ngrok_version = "v2"

Python 2.7

The last version of pyngrok that supports Python 2.7 is 4.1.x, so we need to pin pyngrok>=4.1,<4.2 if we still want to use pyngrok with this version of Python. Its legacy documentation can be found here.

Contributing

If you would like to get involved, be sure to review the Contribution Guide.

Want to contribute financially? If you’ve found pyngrok useful, sponsorship would also be greatly appreciated!

Twilio-Powered Air Quality Texting Service

With wildfire season upon us, use this handy texting tool to find out what the air quality is in your area. Simply text your zip code to (415) 212-4229 for air quality updates. You can also add “map” to the text to be sent an image of your region.

This service isn’t just useful for individuals with limited access to smartphones or the Internet. It also alleviates the load put on air quality sites like AirNow, which are often overloaded and unavailable during wildfire season due to the spike in traffic. Texting this number instead is a great way to get the same information without bogging down those sites, helping them to stay up for others who need to access them.

Spread the word and stay safe! If you’re interested in nerding out over the code, feel free to check it out on GitHub, and if you have questions or comments, tweet @alexdlaird to let him know.

Alex and Jess Are Raising Our Future

“Talk is cheap.” That’s what we say. And, to a degree, it’s true. But bear this in mind: all action is precipitated by talk. People will often try to silence your voice expressly for that reason — because they know it will lead to action.

In the age where hating on millenials is trendy, dismissing the value of social media is equally in vogue — there’s a correlation there, but that’s another post for another time. But like any form of communication, it has its pros and cons, and you get out of it what you put into it.

This is what we put into it. A group of like minded and motivated parents from all across the country banded together using social media to encourage, educate, and challenge each other (and our peers) ideologically and politically while raising the level of discourse. You’ve seen us posting since well before the election, and you’ve seen us continue to join our collective voices as concerned citizens and parents since.

Today, we launched our next initiative: a PAC (Political Action Committee). Raising Our Future is focused on funding federal candidates who are fighting to make a better world for our children on issues of educational equity, social justice, and family planning.

We just launched yesterday. In one day, we raised over $15,000 and took our new Facebook page to 1,300 members. We shared the stories of dozens of founding members throughout the day (we’ll continue this in the days and weeks to come), each post reaching, on average, 2,500 people.

“Stop talking and do something about it.”

We did. We have. We are. We are a force to be reckoned with. Join us.

#RaisingOurFuture #ROFPAC #WeStartedAPAC

Like Us on Facebook: https://www.facebook.com/ROFPAC
Follow Us on Twitter: https://twitter.com/rof_pac
Our Story: https://www.raisingourfuture.org/2017/07/25/alex-and-jess-are-raising-our-future

DONATE: https://www.raisingourfuture.org/donate

Django Dropzone Uploader

Ever been on a trip and, upon return, needed a quick and easy way for all your friends to send you their pictures and videos without burning CDs, sending massive emails, or using third-party services? Or, maybe a better question, ever wondered how to construct a basic Django application with Amazon’s web services, for instance S3?

Look no further. Below is the basic code for a drag-and-drop Django web application that allows users to upload files directly to an Amazon S3 bucket.

Deployment Setup

The code for this project can be found on GitHub.

You’ll need the following installed before cloning or forking the source code:

This project will write to an Amazon Web Services (AWS) S3 storage bucket, so it’s assumed you have an AWS account. If not, create one. S3 is a storage platform from Amazon, and EC2 allows you to spin up virtual servers, which you can use to host this project. If you’re new to AWS, Amazon will likely give you the first year of their smallest EC2 instance free.

This project also includes a deployment script, which allows you to easily deploy the project from your local computer to your server.

Here’s what you need to setup in AWS to ensure your account is ready to receive a deployment of this project:

  • Launch an EC2 instance running Ubuntu Server (or some other Debian-based operating system)
  • Save the .pem key pair file for the EC2 instance as ~/.ssh/myserver.pem
  • Create an EC2 Security Group that has port 80 opened
  • Create an S3 bucket
  • Generate an AWS Access Key and Secret Access Key
  • (Optional) Create an elastic IP and associate it with the EC2 instace you created
  • (Optional) Create a DNS entry of your choosing to point to the elastic IP (AWS will generate their own DNS entry that you can also use, if you don’t have your own domain name)

Fork the Code

Now you’re ready to clone, configure, and deploy the code to your EC2 server.

  • Fork the repository on GitHub
  • Clone your forked repository
  • Modify the variables at the bottom of djangodropzonetos3/settings.py to customize the application
  • You must specify valid values for AWS_ACCESS_KEY_ID, AWS_SECRET_ACCESS_KEY, and AWS_STORAGE_BUCKET_NAME in settings.py
  • Modify the HOSTNAME variables at the top of fabfile.py to point to your EC2 instance’s DNS entry
  • Modify the REPO_URL variable at the top of fabfile.py to point to your fork of the repository

Deploy

The fabfile.py in the repository will take care of setting up the environment for you, including installing and configuring a web server. Isn’t that handy? So you’re ready to deploy by doing the following:

  • From the Command Line at the root of the cloned source, execute “pip install -r reqs.txt”
  • From the Command Line at the root of the cloned source, execute “fab deploy”

That’s it. If this deployment is successful, you should be able to navigate to the hostname for your server in a web browser, drop and save the files, and see them stored in your S3 bucket.

Now, start poking around in the code to learn the ease and awesomeness of Django and how this was accomplished! Leave your thoughts in the comments section below!

DD-WRT NAT Loopback Issue

NAT loopback is what your router performs when you try to access your external IP address from within your LAN. For instance, say your router forwards port 80 to a web server on your LAN. From an outside network, you could simply visit your external IP address from a browser to access the web server. Internally, if NAT loopback is disabled or blocked, you would not be able to access this the same way.

There are any number of valid reasons why you’d want to allow NAT loopback on your network. If you’re like me, you simply want internal and external access to operate in the same way. NAT loopback is needed to accomplish this, and it is simple and safe. Don’t be fooled by the plethora of forum posts crying that NAT loopback is disabled on routers purposefully, that it opens up dangerous security holes, or that it will destroy your network and ultimately your livelihood as you know it. Like the vast majority of scare tactic-based content on the internet, it’s false. Your router will not stab you in your sleep if you allow NAT loopback … although it may emit higher levels of radiation, lace your lipstick and food with carcinogens (compliments of the government, of course), and kill Brad Pitt. Again. Coincidentally, the posts never specify why the claims might be true, lack credible sources, and are rarely found outside of back alley forums. We’re still talking about NAT loopback, right? The internet has made us so gullible …

The primary reason for the security concern is that some consumer routers appear to intentionally disable NAT loopback by default, and there is no way around this with stock firmware. However, this is not an intentional barrier, it’s just a constraint of limited stock firmware. Nothing new there. The simplest solution to this is, as usual, to flash DD-WRT to your router. Then, follow this tutorial to allow NAT loopback.

Implementation

Before proceeding, ensure NAT loopback actually doesn’t work with your version of DD-WRT. Different versions of DD-WRT implement NAT with slight variances, so it’s possible your version of DD-WRT may not actually need the special rules below.

To check if NAT loopback is working on your router, you’ll need your external IP address. If you don’t know your external IP address, just Google “what is my ip”. Now, open a Command Prompt and ping your external IP address. If the command times out, NAT loopback is not working.

In the DD-WRT Control Panel, navigate to the “Administration” tab and click on “Commands”. Add the following rules, then click “Save Firewall” to ensure the rules execute even after the router is rebooted.

insmod ipt_mark
insmod xt_mark
iptables -t mangle -A PREROUTING -i ! `get_wanface` -d `nvram get wan_ipaddr` \\
-j MARK --set-mark 0xd001
iptables -t nat -A POSTROUTING -m mark --mark 0xd001 -j MASQUERADE

Conclusion

That’s it! Now, try pinging your external IP again from the Command Line. This time you should receive packets.

DD-WRT is a always evolving. The developers have stated that they aren’t planning on fixing this issue, but if this procedure doesn’t work for you, leave a comment below and I’ll check to see if something has changed in the latest version of DD-WRT. I’ll try to always keep the tutorial updated with instructions for the latest DD-WRT build.

Also, if you previously followed my DD-WRT Guest Wireless tutorial, this fix should work for both interfaces.

DD-WRT Guest Wireless

If you’ve done any amount of work with routers, you know that it doesn’t take long to start craving consistency. And more advanced functionality that the cheap home interfaces simply don’t grant you. This is the point where you usually break down and start research things like Tomato, OpenWrt, and DD-WRT, just to name a few of the more popular alternatives.

These alternate firmwares don’t just provide a consistent administrative experience across all compatible models and brands, they also turn a cheap home router into a flexible and competitive enterprise router.

My Setup

DD-WRT is my personal firmware of choice. Powerful, flexible, and stable. One thing that I demand in a router is the ability to broadcast a secondary SSID for my guest’s to be able to access wireless internet in my home without also having access to my entire network of computers and devices.

Gladly, because my router’s firmware was extremely slow and buggy, I flashed my Cisco E2500 router with “mini” DD-WRT firmware (the E2500 also supports the “big” firmware). But after reviewing getting the two wireless networks setup on my router, it was brought to my attention that there are no good tutorials for how exactly you are to do this using DD-WRT. The tutorial provided on their own website, in fact, does not work. So, I find that it falls upon me to put out my particular configuration for two mutually exclusive wireless networks from a single router, both networks having access to the WAN port (that is, internet access). There are, of course, multiple ways to do this. Feel free to leave alternative suggestions in the comments.

Create Two Wireless Networks

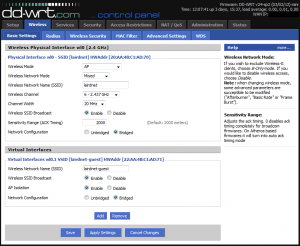
First, create your wireless networks by clicking clicking on “Wireless” and then “Basic Settings”. We’ll setup security in a moment. After you’ve configured your private wireless network setup, click “Add” under “Virtual Interfaces” to add the “wl0.1 SSID”. Give your guest network a separate SSID, and select “Enable” for “AP Isolation”.

Now click “Save” and “Apply Settings”.

ssid

Setup Wireless Security

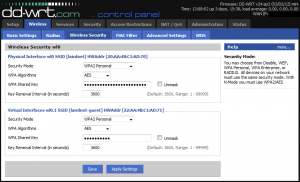
Navigate over to the “Wireless Security” tab. After you’ve setup the wireless security for your private network, setup similar security for your guest SSID. I would advise against leaving your guest wireless completely open, but since you’re going to be giving out this password to your guests, it should probably be a little simpler than your private network’s key.

Now click “Save” and “Apply Settings”.

security

Create Bridge

At this point, you have two wireless networks broadcasting on two separate SSIDs. Both networks should have internet access, but you’ll also notice both networks dish out IPs in the same subnet, and both networks are clearly able to see each other. While you may like and trust your guests, that doesn’t mean you necessarily want them to have access to all your network devices. To separate the network routing, we need to create a bridge and place the guest network into a different subnet.

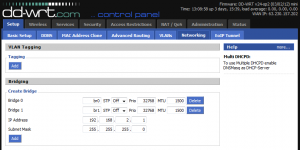
Click on “Setup” and then on the “Networking” tab. Under “Create Bridge” click “Add” to add a new bridge. Give the bridge a name, and modify the IP address of the bridge to be in a different subnet than your private network. For example, my private network grants IPs in the subnet 192.168.1.0/24, so my guest network in the image below is setup to grant IPs in the subnet 192.168.2.0/24.

Now click “Save” and “Apply Settings”. Though the page may refresh right away, you may need to wait about a minute before the bridge is available to use in the next few steps.

create-bridge

Assign Guest Network to Bridge

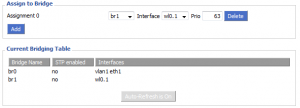
Under “Assign to Bridge” click “Add”. Select the new bridge you’ve created from the first drop-down, and pair it with the “wl0.1” interface.

Now click “Save” and “Apply Settings”.

assign-bridge

Create DHCP Server for Guest Network

We’re almost there! We’ve created a bridge in an alternate subnet, but the alternate subnet doesn’t have a DHCP server, so our guests currently cannot access the guest SSID (unless they assign themselves a static IP). Scroll to the bottom of the “Networking” page and under “Multiple DHCP Server” click “Add”. Ensure your newly created bridge name is selected from the first drop-down menu.

Now click “Save” and “Apply Settings”. Congratulations, we now have a working, separate guest network! Unfortunately, while users can connect to the network and DHCP is running, guest users aren’t able to access the internet quite yet.

bridge-dhcp

Create Firewall Rules for Guest Network

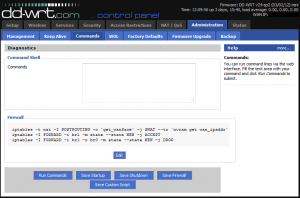
Navigate to the “Administration” tab and click on “Commands”. We need to add three rules to our firewall settings before our private network is completely secure and our guest network has internet access. Add these three rules (one per line) to the “Commands” text field, then click “Save Firewall” to ensure the rules execute even after the router is rebooted.

iptables -t nat -I POSTROUTING -o `get_wanface` -j SNAT --to `nvram get wan_ipaddr`
iptables -I FORWARD -i br1 -m state --state NEW -j ACCEPT
iptables -I FORWARD -i br1 -o br0 -m state --state NEW -j DROP

firewall

Improve Guest Security

Pete Runyan commented with a few more ways to nail down the security of the guest network. For one, your guests likely assume that their device on the guest network is not accessible from other devices on the same network, so you’ll want to add the firewall rules below to make that true. It’s also probably unnecessary (depending on your needs) to allow users on the guest network SSH, Telnet, or GUI access to the router. Append these firewall rules to harden the security of all of your networks!

iptables -I FORWARD -i br0 -o br1 -m state --state NEW -j DROP
iptables -I INPUT -i br1 -p tcp --dport telnet -j REJECT --reject-with tcp-reset
iptables -I INPUT -i br1 -p tcp --dport ssh -j REJECT --reject-with tcp-reset
iptables -I INPUT -i br1 -p tcp --dport www -j REJECT --reject-with tcp-reset
iptables -I INPUT -i br1 -p tcp --dport https -j REJECT --reject-with tcp-reset

Conclusion

You should now have two working SSIDs: a private one for your home network, and a guest network for your visitors. Both networks should have internet access. The private network will function the same as a LAN and single wireless network did before, with the wireless network having full access to the LAN connections. The guest network, on the other hand, is separated from the private network. Additionally, each individual device on the guest network is separate from another, so guests cannot see each other.

If you’ve gotten to this point and something is not working, or your guest network does not have internet access, don’t be alarmed. DD-WRT is a always evolving, and it’s entirely possible bridge settings or firewall rules for the latest build have changed. If this tutorial does not produce the desired result, please leave a comment below. I’ll try to always keep the tutorial updated with instructions for the latest DD-WRT build.

A Correction for the WSJ: So, Who Did Invent the Internet?

Gordon Crovitz wrote an opinion piece for the Wall Street Journal titled Who Really Invented the Internet? Fortunately, it’s only an opinion piece, because there was little more than opinion, littered with plenty of misinformation, in the writing. You can read the article here.

Now, it’s not like I look to the WSJ for the latest technology information (or, in this case, technology history). Far from it. And generally when a here’s-the-truth-you-never-knew article starts with political propaganda, it’s pretty safe to assume that whatever comes next is going to be absurd. The article’s introduction could essentially be summarized as, “Obama said something that was true, but I’ll be damned if I can’t find a way to make it sound false!”

Even still, to those of us in the technology field, the “first computer” and “who invented the internet” discussions are highly revered and hotly debated, so when someone not in the industry starts boasting that they have a complete and final answer to these discussions, we just scoff. In Crovitz’s defense, he seems to be confusing “internet” with “World Wide Web” and many other terms that merely relate to networking and computers. But that’s about the extent I’d go to to defend him; he’s a conservative author trying to make something out of nothing just because a liberal said it.

Due to the fact that I’m more than a little OCD, I wound up relating the history of internet technology through the ages to my Grandpa, who originally sent me the Crovitz article. Much of the details below are in response to specific parts of Crovitz’s article, so, as painful as it may be, I recommend you read that article first. Alright, ready? Begin.

Personal Computer: The term “personal computer” was not coined until 1975 for the Altair 8800. However, it is disputed that Xerox created the first “personal computer”, by whatever modern definition you use. IBM created the first electronic computer in 1953 (the IBM 701), Digital Equipment Corporation created the first digital computer in 1960, and Hewlett-Packard released the first mass-produced digital computer in 1968, the HP 9100A.

Personal Workstation: This is the term the WSJ author is looking for in their article. The first personal workstation, a “workstation” being a computer that can be connected to another computer (in this case, through the Ethernet technology he referenced), was created by Xerox in 1974. However, the computers used by ARPANet were technically also workstations, just not mass produced.

Intranet (take special note of the “a”): A connection between two or more computers within the same network. The network in your house is an “intranet”.

Internet (take special note of the “e”): A connection between two or more networks. The wires that connect your house’s network to mine are the “internet”.

ARPANet: The first computer network (or “intranet”), created by the Department of Defense, which was fully implemented in 1969. I’ve never heard it associated with nuclear strikes or anything of the sort. It was created merely to replace slow and overused satellite communication between government agencies. When originally created, it did not use TCP/IP, it used NCP.

DNS: DNS stands for “Domain Name System”. It’s interesting that, for an article claiming Ethernet was more defining to the internet than TCP/IP, the article makes no mention of DNS, the third essential component to the modern internet. Though you type in “google.com” to get to Google, Google’s website actually lives at an Internet Protocol (IP) address of 173.194.34.165 (at the time of this writing). This IP address is similar to a human street address. People cannot be expected to remember an IP addresses for their favorite websites, so DNS was invented to resolve a host name (google.com) to an IP address. This is similar to me saying “Ben and Jerry’s on Navy Pier” instead of “Ben & Jerry’s – NAVY PIER, 700 East Grand Ave., Chicago, IL 60611-3436”.

RFC: RFC stands for “Request for Comment”. The article does not mention these, but they are crucial to understand when things were adopted. They’re sort of like the Congressional bills of the technology world. RFC documents are official definitions of technological protocols or interfaces. When something is adopted as a standard, a RFC fully defining it is written, and, if other people want to interface with it, they use that “law” to know how things work. The very first RFC, RFC 1, was called “Host Software” and dictated the infrastructure of ARPANet. RFC 791 was for TCP/IP in 1981. RFC 894 was for Ethernet in 1984. RFC 1035 was for DNS in 1987. These dates do not necessarily correspond to when the interfaces were created, but they do indicate when the interfaces were standardized and/or adopted.

World Wide Web: The World Wide Web was formally introduced in 1989. The World Wide Web is, in very loose terms, the combination of HTTP, HTML, and database communication that transfers web content by a standardized means to a web browser.

Difference Between Intranet and Internet

So, what is the difference between the an “intranet” and the “internet”. First of all, the foundational structures of the “internet” are identical to the “intranet” (that being TCP/IP referenced in the article). Once there was the possibility for the intranet, the possibility for the internet also existed, but it was not realized until a bit later, which is why Xerox is trying to claim credit for that. It’s a chicken-or-the-egg argument. Naturally, each company (and the Pentagon) claim different loose definitions of all these terms so that they can claim credit for actually inventing the end result. The fact is, none and all of them invented it … which coincides with Obama’s remarks pretty well, if you ask me.

TCP/IP and Ethernet

First of all, it’s sad that the article references Vinton Cerf but makes no mention of Bob Kahn. They collaborated together to define TCP/IP, but Kahn rarely gets the credit he deserves. Kahn was actually the one with the idea of TCP/IP, and Cerf was in charge of the implementation and later the RFC definition.

Secondly, it should be highly suspect that much of the WSJ author’s claims come from a book written about Xerox. More significantly, after the WSJ article was published, the author of the cited book released a statement refuting the article and saying the article misrepresented the content of his book.

Naturally, Xerox will claim “full credit” for a discovery, as many other companies have done as well, but given they utilized standards that had already been put in place by others before them (namely TCP/IP), this is disingenuous at best. However, their contribution to the internet’s development was equally strong. Ethernet was merely a communication standard that allowed passing data (at very high speeds) between two computers using TCP/IP. Neither technology would ever have been adopted by the private sector (and ultimately the world) without something like …

DNS

The Domain Name System was invented in 1983, and the internet would not exist without it, just like TCP/IP and Ethernet. It was created when issues were seen in how hosts were resolved with ARPANet. It was obvious that as ARPANet got larger, the way hosts were resolved (me asking, “Hey, what’s Mom and Dad’s address?) would become weaker and weaker (and certainly slower and slower). So they decentralized their host resolution to several Domain Name Systems rather than a centralized location at the Pentagon. This was essentially the birth of the privatized internet as we know it, but that is not to discredit its foundations.

So Did Xerox Invent the Internet or Not?

Short answer? No. Xerox has never been one of the discussion points in the “who invented the internet” within knowledgeable circles.

Long answer? It’s a bit arrogant for Xerox (or any one company or government organization) to accept or take full or even majority credit for the invention of the modern day internet. It was a combined effort of multiple unrelated parties, companies, and government entities. People usually credit the Department of Defense with the creation of the internet because, well, they created the first internet. And without the funding and research for TCP/IP, the advancement toward what we have today would have been much slower. Additionally, though Xerox coupled TCP/IP with their own technology to make Ethernet, they did not use Ethernet on the internet. They used it on their own intranet, or internal network, because at the time only government organizations had access to the internet. More importantly, TCP/IP and other internet protocols could exist outside of an internal network, which is where Ethernet is used. Ethernet is used to join computers to an intranet, not to join networks to the intranet. Xerox’s contribution certainly increased the speed and reliability of internal network communication, but that is an indirect contribution to the internet. It is not an essential part of the components that makeup the internet.

What About the Privatization of the Internet?

The reason the internet became privatized had little to do with little government/big government politics, as the WSJ implies, and everything to do with decentralization. The fundamental structure and combination of TCP/IP and network-to-network communications led to DNS, and once DNS was introduced it became obvious that the internet was going to become a worldwide tool that could not be contained or centralized by any one government or entity. However, the U.S. government did still control all the DNS servers, and government organizations were the only ones with access to the internet.

Though Xerox enabled reliable intranet communications with Ethernet (which, by the way, was given back to the government for their use primarily), ARPANet expanded to become the internet, and DNS offered the potential to use the service around the globe, it was not commercialized. It was not until 1992 when Congress passed a bill (spearheaded by Al Gore, which is usually why people misquote him to make the joke in which he claims to invent the internet) that allowed commercial access to the internet. This began the privatization of the internet, but the government still controlled all DNS servers.

For six more years the internet was essentially still controlled by the U.S. government, but commercial entities were allowed to use it. In 1998 (not sure what event the article is referring to when it says 1995), the Clinton administration issued a mandate to form a non-profit organization called the International Corporation of Assigned Names and Numbers (ICANN). The U.S. government gave control of all DNS servers, maintenance, and documentation of internet infrastructure to ICANN. And you thought Google owned the internet. At that point, the internet became officially and completely privatized.

Doesn’t Britain Claim They Invented the Internet?

Actually, no. If you watched the Olympics 2012 Opening Ceremonies, Tim Berners-Lee was paraded through the stadium and loudly proclaimed as the “inventor of the World Wide Web”. And there’s the distinction. London never claimed he invented the “internet”. There is a difference. The “internet” and the “World Wide Web” are two distinct things, though they obviously operate together and are essentially synonymous to the average internet user today.

In 1989, Tim Berners-Lee had an idea for a database of hypertext links. Berners-Lee implemented what he called the World Wide Web with the collaborative help of Robert Cailliau. It didn’t take long for the two of them to realize the potential the World Wide Web could offer to the internet, so in late 1990 Berners-Lee developed the protocol necessary to transmit World Wide Web data across the internet: HyperText Transfer Protocol (HTTP) and HyperText Markup Language (HTML). Along with this, he developed the first web browser, which he called simply the WorldWideWeb. Joining HTTP, HTML, and a browser with the internet gave Berners-Lee the ability to pass much more valuable data from point to point, displaying that data in a specifically intended way to the end-user.

In regards to the WSJ article, it’s also possible that the author of the WSJ was confusing the term “internet” with “World Wide Web”. By 1994, better graphical browsers had been created, and the World Wide Web standard had pretty well been adopted, but primarily only by universities and research labs. In late 1994, Berners-Lee founded the World Wide Web Consortium (W3C), which maintains many of the standards for the World Wide Web still today. After W3C was founded, and in early 1995, the potential the World Wide Web coupled with the internet had to offer the commercial world became apparent, and the internet really started taking off.

Conclusion

Even still, the Department of Defense, Vinton Cerf, and Bob Kahn do deserve full credit for the creation of the first intranet/network and the initial ideas for networking protocols. The natural successor to that was Ethernet, DNS, and ultimately a privatized and distributed internet as we know it today.

Here’s a more simple example to help with the comparison. Assume for a moment that, prior to Henry Ford, nobody had ever done anything with a vehicle that moved (without assistance from an outside force) from point A to point B. Ford created the Quadricycle as his first vehicle. He then adapted that into the Model T. Is the Model T any more or less of a vehicle? It has more of the parts that we’re used to today, and it was certainly much more luxurious. But to say then that, because the Model T is more like what we have today, the Quadricycle was not a vehicle is silly. The Quadricycle was still a vehicle that moved you from point A to point B. The Model T was the natural successor to that, and cars have progressively become more and more advanced (with newly invented technology added to them) as society has advanced.

In the same way, ARPANet moved network information from point A to point B. The internet was the natural successor to an intranet, but the same ideas and fundamental technology were used for it, so it is safe to say that the government formed what has become the internet. Which, I believe, was President Obama’s point. No argument here that the internet boomed came in 1998 when it was fully privatized, but the internet also would not have been established in the first place without government research and funding.